
Learning how to use a piping bag is less about squeezing harder and more about building a controlled system. The bag holds the frosting or filling, the piping tip shapes it, and a coupler can connect the two while allowing the tip to be changed without emptying the bag.
Once the bag size, tip, consistency, filling method, and hand position work together, piping becomes much more predictable. The same basic setup can be used for buttercream borders, cupcake swirls, lettering, choux pastry, meringue, cookie dough, whipped fillings, mashed potatoes, deviled eggs, and other pipeable foods.
This guide explains how to choose and prepare piping bags, piping tips, and couplers; how to fill and hold the bag; how to create common shapes; and how to correct the problems that cause leaking, uneven lines, hand fatigue, and broken decorations.
What Is A Piping Bag And How Does It Work?
A piping bag is a cone-shaped food bag with a wide opening at the top and a narrow point at the bottom. Frosting or another pipeable mixture is loaded through the wide end. Pressure applied near the top pushes the contents toward the point, where the mixture exits through a cut opening or a shaped piping tip.
- Opening shape: A plain cut opening produces a simple round flow, while a piping tip forms stars, petals, leaves, ribbons, ridges, or fine lines.
- Mixture consistency: Stiffer frosting holds sharp detail; softer frosting flows easily but may lose definition.
- Pressure: Steady pressure produces an even line. Sudden changes create thick and thin sections.
- Movement: The angle, height, direction, and speed of the piping tip determine the finished shape.
Types Of Piping Bags?
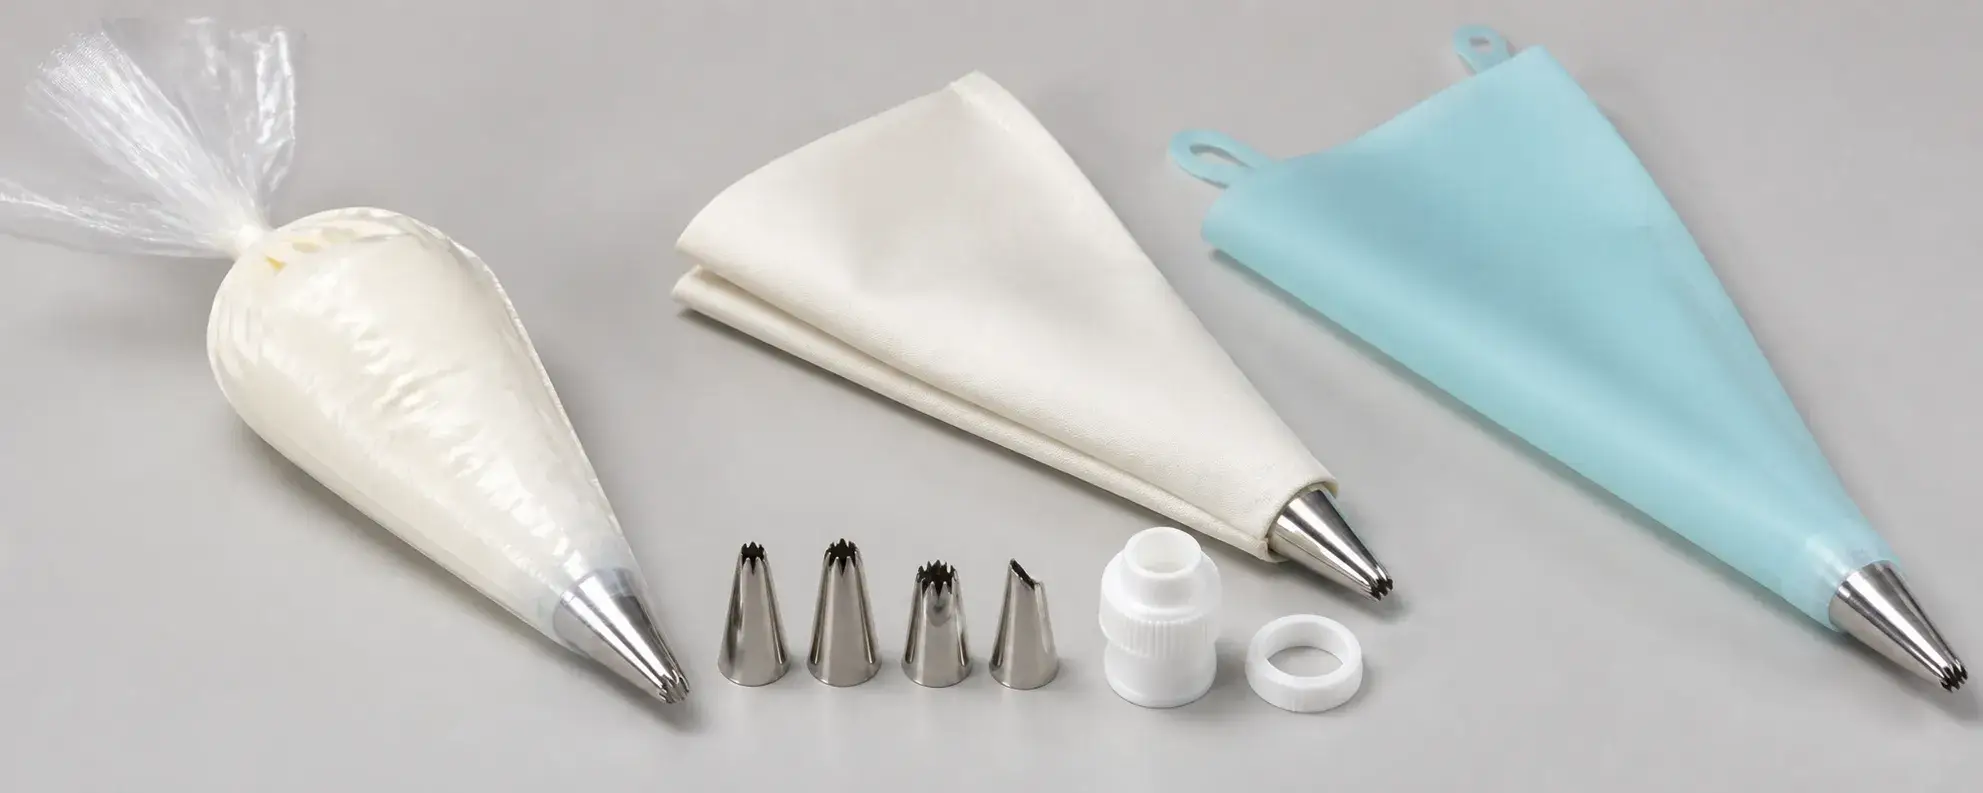
Piping bags are commonly supplied as disposable plastic bags or reusable bags made from coated fabric, silicone, or another washable material. Both formats can produce the same decorations, but they suit different workloads and cleaning routines.
Disposable Piping Bags
Disposable piping bags are convenient when several colors or fillings are used in one session. Each color can remain in its own bag, which reduces washing and limits color transfer. A clear bag also makes it easy to see air pockets, remaining product, and whether two colors are blending as intended.
Thickness and seam strength matter. A bag that is too light for stiff cookie dough or cold buttercream may stretch, split at the side seam, or feel slippery under pressure. For dense mixtures or commercial preparation, select a piping bag designed for the expected load rather than assuming every disposable bag has the same strength.
Reusable Piping Bags
Reusable piping bags are useful for repeated work with one frosting or filling. Their more substantial construction can provide a secure grip and better support for heavy mixtures. They also reduce the number of single-use bags needed when washing and drying can be handled correctly.
Inspect a reusable bag before filling it. Worn seams, cracked coatings, retained odors, or moisture trapped near the narrow end can affect hygiene and performance. The bag should be fully clean and dry, including the inside of the tip opening.
| Bag Type | Useful For | Main Advantage | Check Before Use |
|---|---|---|---|
| Disposable plastic | Multiple colors, short production runs, quick cleanup | Fast setup and clear visibility | Film thickness, grip, seam strength, and food-contact suitability |
| Reusable | Repeated use, dense mixtures, regular bakery work | Firm handling and reduced single-use consumption | Cleanliness, dryness, seam condition, and odor retention |
What Size Piping Bag Do You Need?
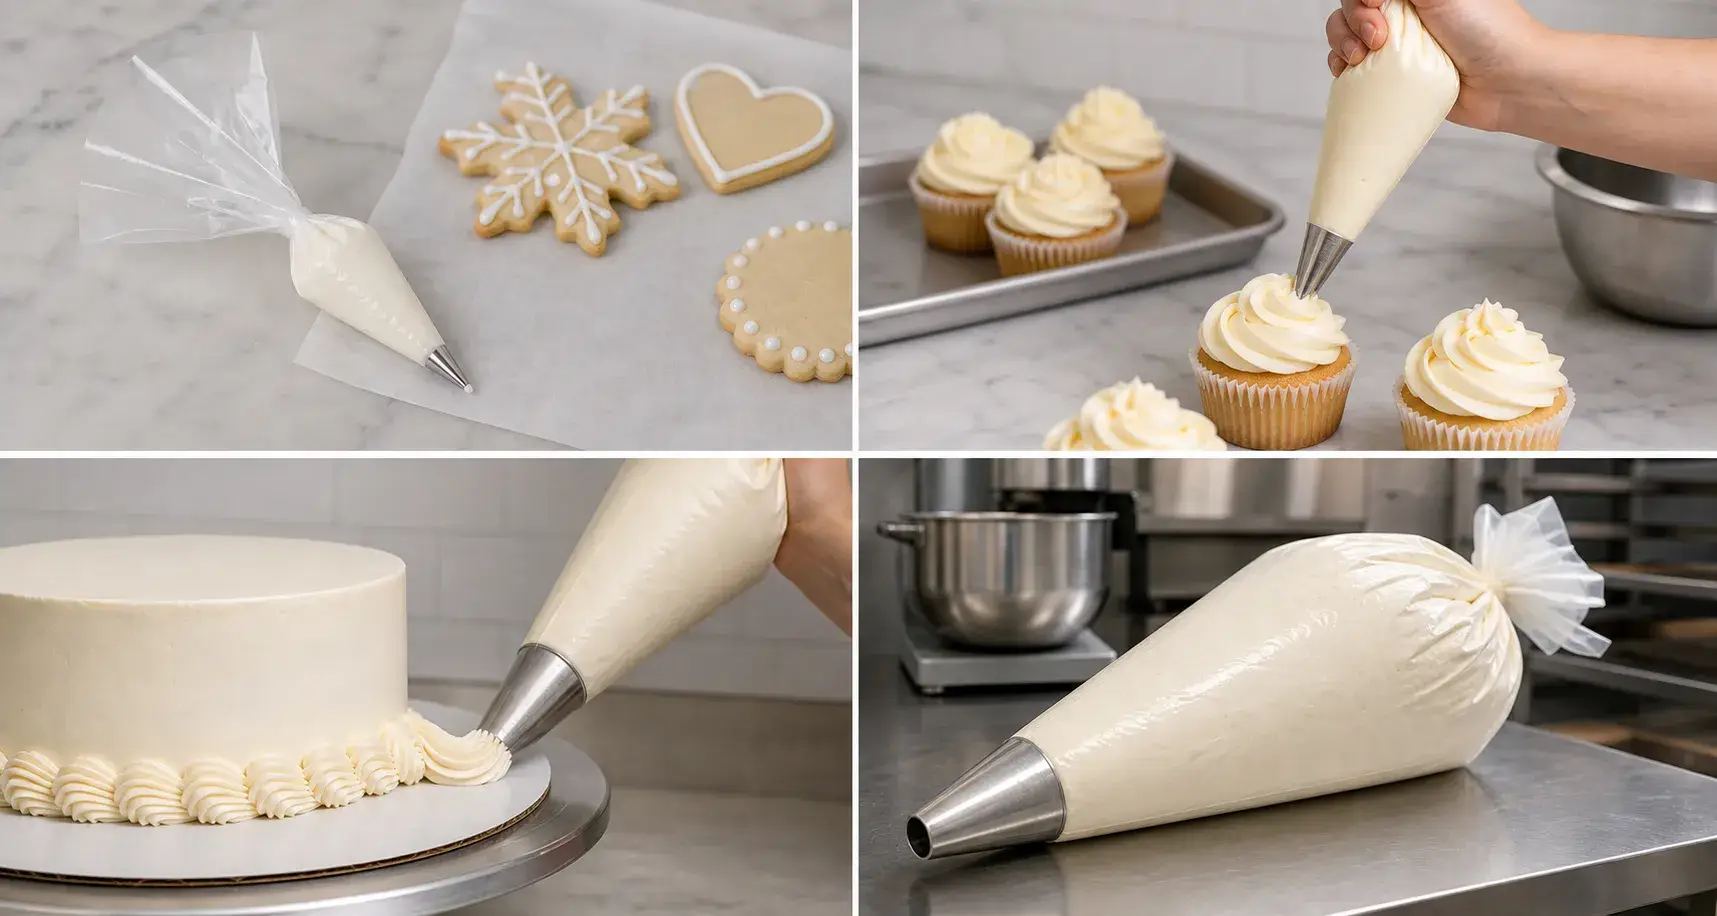
Choose a piping bag according to the amount and density of the mixture, not only the size of the decoration. An oversized bag becomes heavy and difficult to control. An undersized bag needs frequent refilling and may push frosting back out of the top.
| Approximate Bag Size | Typical Use | Handling Note |
|---|---|---|
| 8-10 inch | Fine writing, small details, small color portions | Easy to guide but requires more refills |
| 12-14 inch | Cupcakes, borders, cookies, general decorating | Balanced capacity and control for most home use |
| 16-18 inch | Cake coverage, large batches, choux or thicker mixtures | Fill conservatively so the bag does not become tiring to hold |
| 21 inch and larger | High-volume bakery or food-service production | Best when the operator is comfortable managing the added weight |
For most decorating jobs, a medium bag filled only partway is easier to manage than a large bag packed to capacity. If you need more product, refill the bag or prepare a second bag rather than sacrificing control.
What Are Piping Tips And Couplers?
Piping tips are shaped nozzles placed at the narrow end of the bag. Their openings control the cross-section of the frosting as it leaves the bag. Tips may be stainless steel, another metal, or food-grade plastic, and they are available in many sizes.
A piping coupler is a two-piece fitting that holds a piping tip on the outside of the bag. The coupler base sits inside the bag, while a threaded ring screws onto it from the outside. Because the tip is held between these parts, you can remove the ring, replace the tip, and continue using the same bag of frosting.
Couplers are especially useful when one color needs to create several patterns. They are less necessary when a single large tip will remain on the bag for the entire job. Standard and large piping tips usually require different coupler sizes, so confirm that the tip, base, and ring fit together before filling the bag.
How To Choose A Piping Tip
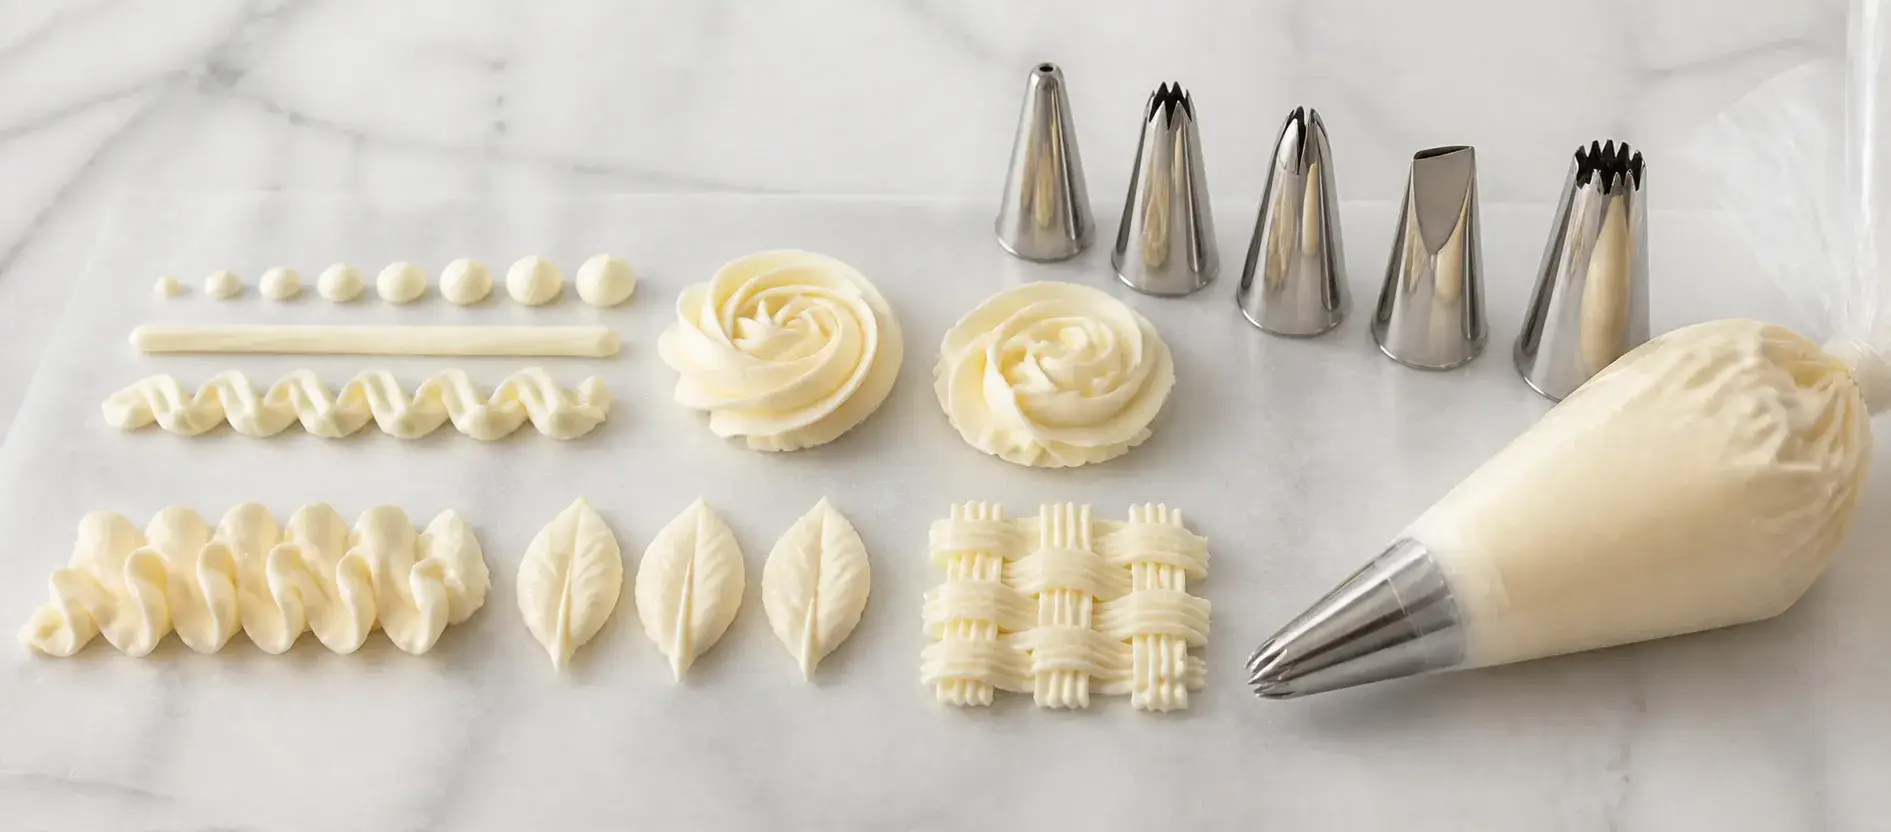
Tip numbers vary by manufacturer, so select a tip by opening shape and actual size rather than relying on the number alone. A small version and a large version of the same shape can produce very different results.
| Tip Shape | Common Results | Technique Focus |
|---|---|---|
| Round | Dots, beads, outlines, lettering, filling | Keep pressure steady for an even line |
| Open star | Shells, stars, rosettes, cupcake swirls | Avoid touching the ridges after they form |
| Closed star or drop flower | Deep-ridged swirls, flowers, textured borders | Use a smooth frosting without hard particles |
| Petal | Ruffles, ribbons, flower petals | Orient the narrow edge according to the petal direction |
| Leaf | Leaves and pointed accents | Release pressure before pulling away to form a clean point |
| Basketweave or ribbon | Flat bands, woven patterns, smooth or ridged ribbons | Keep tip orientation consistent as you move |
Before decorating the finished product, pipe several test shapes on parchment. This confirms the tip orientation, removes trapped air near the opening, and shows whether the mixture is stiff enough to hold detail.
How To Fit A Piping Bag With A Coupler
Install the coupler before adding frosting. Cutting the bag after it is filled makes accurate fitting difficult and increases the risk of leakage.
- Separate the coupler. Unscrew the ring from the coupler base and set the piping tip aside.
- Insert the base. Drop the narrow end of the coupler base into the empty piping bag and push it gently toward the pointed end.
- Mark the cutting point. From outside the bag, identify the groove or threaded area where the ring will attach. The cut should allow the narrow end to pass through while leaving enough bag material for the ring to grip securely.
- Move the base back and trim the bag. Pull the coupler away from the point, cut a small opening, and push the base forward again. Start smaller than you think necessary; the opening can be enlarged, but it cannot be reduced.
- Add the piping tip. Place the tip over the exposed coupler base on the outside of the bag.
- Secure the ring. Screw the ring over the piping tip until the assembly is firm. It should hold the tip without crushing or distorting the bag.
- Check the seal. Tug lightly on the tip and confirm that no film is trapped unevenly in the threads.
To change tips, set the bag down with the filled end folded or clipped, unscrew the ring, replace the tip, and reinstall the ring. Wipe frosting from the coupler threads first so the ring can tighten evenly.
How To Fit A Piping Tip Without A Coupler
A piping tip can sit directly inside a disposable or reusable piping bag. This is a simple setup when you will use one tip throughout the job, especially for large cupcake or cake-decorating tips.
- Place the tip inside the empty bag and slide it toward the narrow end.
- Estimate where the tip should emerge. The opening needs to expose the shaped end without allowing the wider shoulder of the tip to pass through.
- Move the tip back, cut a small section from the bag, and test the fit.
- Enlarge the cut gradually until the tip sits securely. The bag should cover the sides of the tip and stop behind its widest section.
If the opening is cut too large, pressure can force the tip out of the bag. Transfer the frosting to a new bag rather than trying to hold a loose tip in place while piping.
How To Fill A Piping Bag Without Making A Mess
A clean fill keeps frosting near the lower half of the bag and leaves enough empty material at the top to twist closed. Before filling, push a small section of the bag into the coupler or piping tip. This temporary plug helps prevent soft frosting from leaking out.
Method 1: Fill the Bag Over Your Hand
- Hold the middle of the bag with your non-dominant hand and fold the top edge outward over your fingers to form a wide cuff.
- Use a flexible spatula to place frosting deep into the bag rather than wiping it around the upper walls.
- Scrape the spatula against the inside edge of the cuff as you withdraw it.
- Unfold the cuff, press out large air pockets, and twist the empty top of the bag above the frosting.
Method 2: Use a Glass or Tall Container
- Place the empty piping bag inside a stable glass, measuring cup, or narrow container.
- Fold the upper third of the bag over the rim so the opening stays wide.
- Add the mixture in portions, pressing each portion downward to reduce trapped air.
- Lift the cuff from the container, gather the top, and twist it closed.
Fill a piping bag about halfway when the mixture is stiff or the bag is large. For lighter fillings, it can be filled somewhat higher, but leave enough material to create a secure twist. Overfilling makes pressure harder to control and often forces frosting backward over your hand.
After twisting the top, hold the bag with the tip pointing upward and gently push the frosting toward the outlet. Untuck the temporary plug, point the tip into a bowl or onto parchment, and squeeze until the first smooth flow appears.
How To Hold And Control A Piping Bag
Use your dominant hand to hold the twisted portion immediately above the frosting. This hand supplies pressure. Keep the twist tight and move it downward as the bag empties so the contents continue moving toward the tip instead of spreading back into unused space.
Place the fingers of your other hand near the lower part of the bag or lightly around the coupler. This hand guides position, angle, and direction. It should not squeeze hard enough to create a second pressure point.
Two working angles cover most decorations:
- About 90 degrees to the surface: useful for stars, rosettes, dots, drop flowers, macarons, and centered cupcake swirls.
- About 45 degrees to the surface: useful for writing, borders, shells, leaves, ruffles, and lines that move across the surface.
For a clean ending, stop pressure before lifting or pulling the tip away. Continuing to squeeze during the release creates tails and stretched points. The rhythm is: position, squeeze, move if required, stop squeezing, then lift away.
Common Piping Bag Problems And How To Fix Them
| Problem | Likely Cause | Practical Fix |
|---|---|---|
| Frosting leaks around the tip | Bag opening is too large, coupler is loose, or bag film is caught in the threads | Refit the coupler; transfer to a new bag if the opening cannot grip the tip |
| Frosting comes out of the top | Bag is overfilled or the top is not kept twisted | Remove some frosting, clean the upper bag, and maintain a tight twist above the mixture |
| Line contains gaps or sudden bursts | Air pockets are trapped in the frosting | Press the mixture downward before twisting and pipe onto parchment until the flow is continuous |
| Ridges look soft or disappear | Frosting is too warm or too soft | Cool or thicken the mixture and avoid warming the entire bag in your hands |
| Piping requires excessive force | Mixture is too stiff, tip is too small, or particles are blocking the opening | Adjust consistency, use a larger tip, or strain/remove hard pieces |
| Bag slips while squeezing | Outside is greasy, hands are wet, or bag surface lacks grip | Wipe hands and bag, reduce the fill weight, and hold at the twisted top rather than the middle |
| Disposable piping bag splits | Mixture is too dense, bag is damaged, or pressure is concentrated at one seam | Use a stronger bag, soften the mixture if appropriate, and apply pressure from the top instead of squeezing the sidewall |
How To Clean And Store Reusable Piping Bags
- Remove the piping tip and coupler as soon as practical so frosting does not dry inside the narrow opening.
- Scrape out remaining food with a spatula rather than forcing large amounts into the sink.
- Turn the bag inside out if its construction allows it, then wash all surfaces with warm water and suitable dish detergent.
- Use a small brush to clean coupler threads and the shaped openings of piping tips.
- Rinse thoroughly and allow every component to air-dry completely before storage.
- Store the bag open and dry. Avoid folding a damp bag into a sealed container.
Frequently Asked Questions About Piping Bags
Can You Use A Piping Bag Without A Piping Tip?
Yes. Cut a small opening at the point of the bag to pipe fillings, round lines, dots, drizzles, or rustic decorations. Start with a small cut and enlarge it gradually. A plain bag opening cannot create the sharp ridges or specialized shapes produced by a piping tip.
Do You Need A Coupler For Every Piping Bag?
No. Use a coupler when you want to change tips on one bag or when the tip needs extra support. Place the tip directly inside the bag when one tip will be used for the entire job. Large tips are often used without a coupler because they require a matching large coupler or may be stable when fitted directly.
How Much Should You Cut Off A Piping Bag?
Cut only enough for the coupler base or narrow section of the piping tip to pass through. The bag must remain behind the wider part of the fitting. Because tip shapes and sizes differ, there is no single cutting measurement that works for every setup. Test a small cut first.
How Do You Keep Frosting From Drying In The Piping Tip?
During short pauses, cover the tip with a clean damp cloth or suitable tip cover and keep the bag away from heat. If frosting has already hardened in the opening, remove and clean the tip rather than increasing pressure, which may split the bag or release a sudden plug.
Can A Zip-Top Storage Bag Replace A Piping Bag?
A strong food-storage bag with one corner trimmed can handle a small amount of soft icing or a simple drizzle. It is less comfortable for detailed decorating because its shape, seams, grip, and corner geometry are not designed for controlled piping. Dense mixtures can also place excessive pressure on the corner seam.
Why Does The Piping Bag Feel Hard To Squeeze?
The mixture may be too cold or stiff, the tip may be too narrow, or an ingredient may be blocking the opening. Check the mixture before applying more force. Excess pressure reduces control, tires the hand, and can split a disposable piping bag.
Conclusion
Prepare the bag and fitting before mixing several colors or beginning a large batch. Match the bag size to the amount of product, confirm the piping tip and coupler are compatible, cut the opening conservatively, and keep the upper portion of the bag clean enough to twist securely.
When piping, use the top hand for pressure and the lower hand for direction. Test the first strokes away from the finished product, keep pressure steady, and stop squeezing before lifting the tip. These habits solve more problems than simply changing to a different piping nozzle.
For food-service buyers selecting disposable piping bags, evaluate the finished bag rather than only the dimensions printed on the carton. Film strength, seam quality, grip, tip fit, food-contact suitability, pack consistency, and performance with the intended filling all affect whether the bag works reliably in daily production.